
Video Walkthrough

A. Hook the Rear Panel
With the exhaust holes nearest the front of the PC, you will find two latches on the rear panel that will correspond to two holes on the PC. Hook them on.
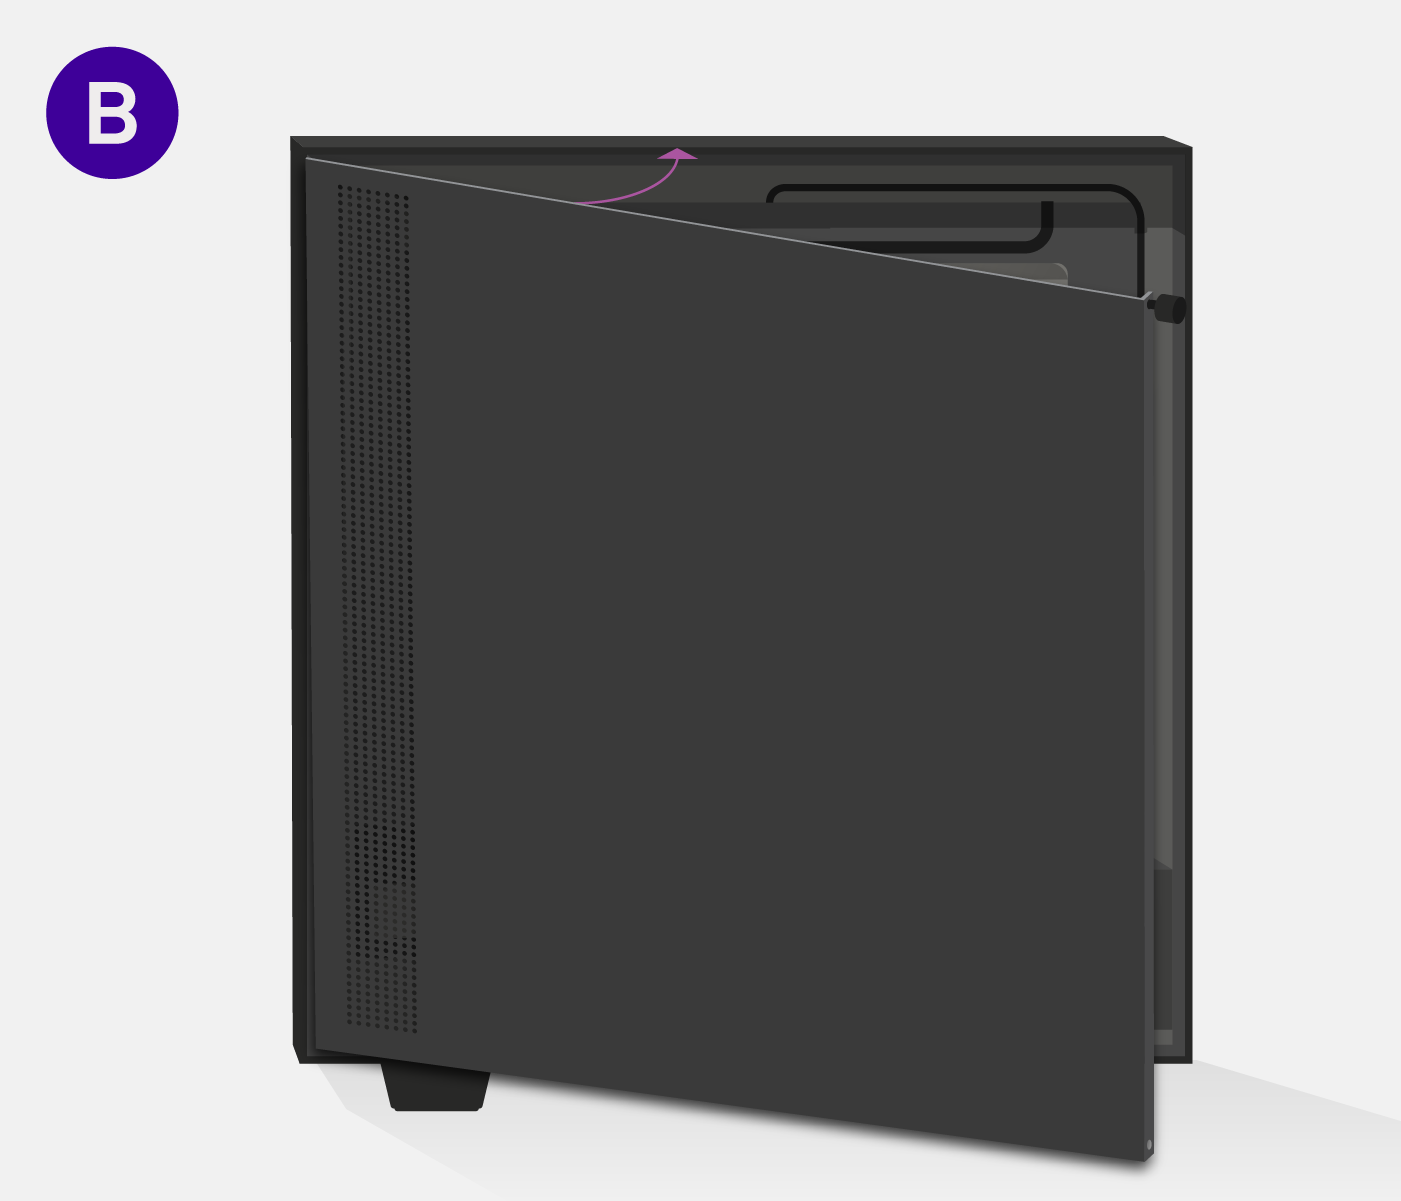
B. Swing Closed the Panel
With the panel secure in the front, swing the back of the panel towards the PC. Make sure that no wires get in the way when closing the PC panel.
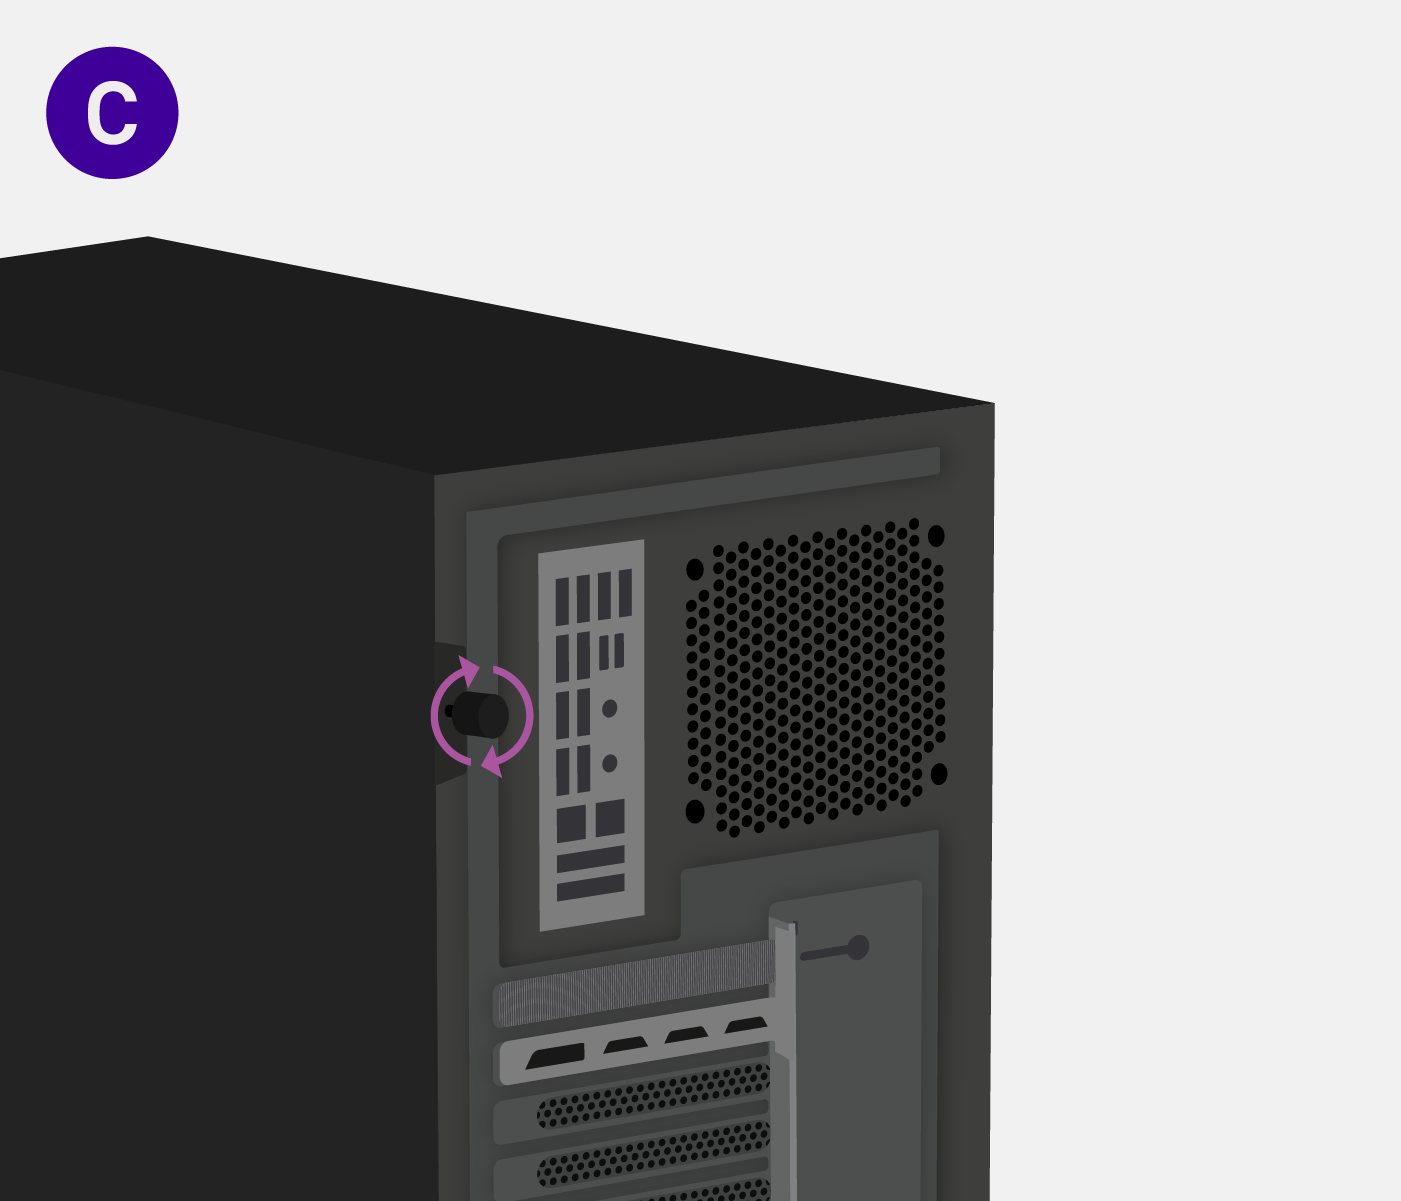
C. Secure the Rear Panel
Screw the rear panel onto the PC using the captive thumb-screw that’s located on the back of the metal panel.
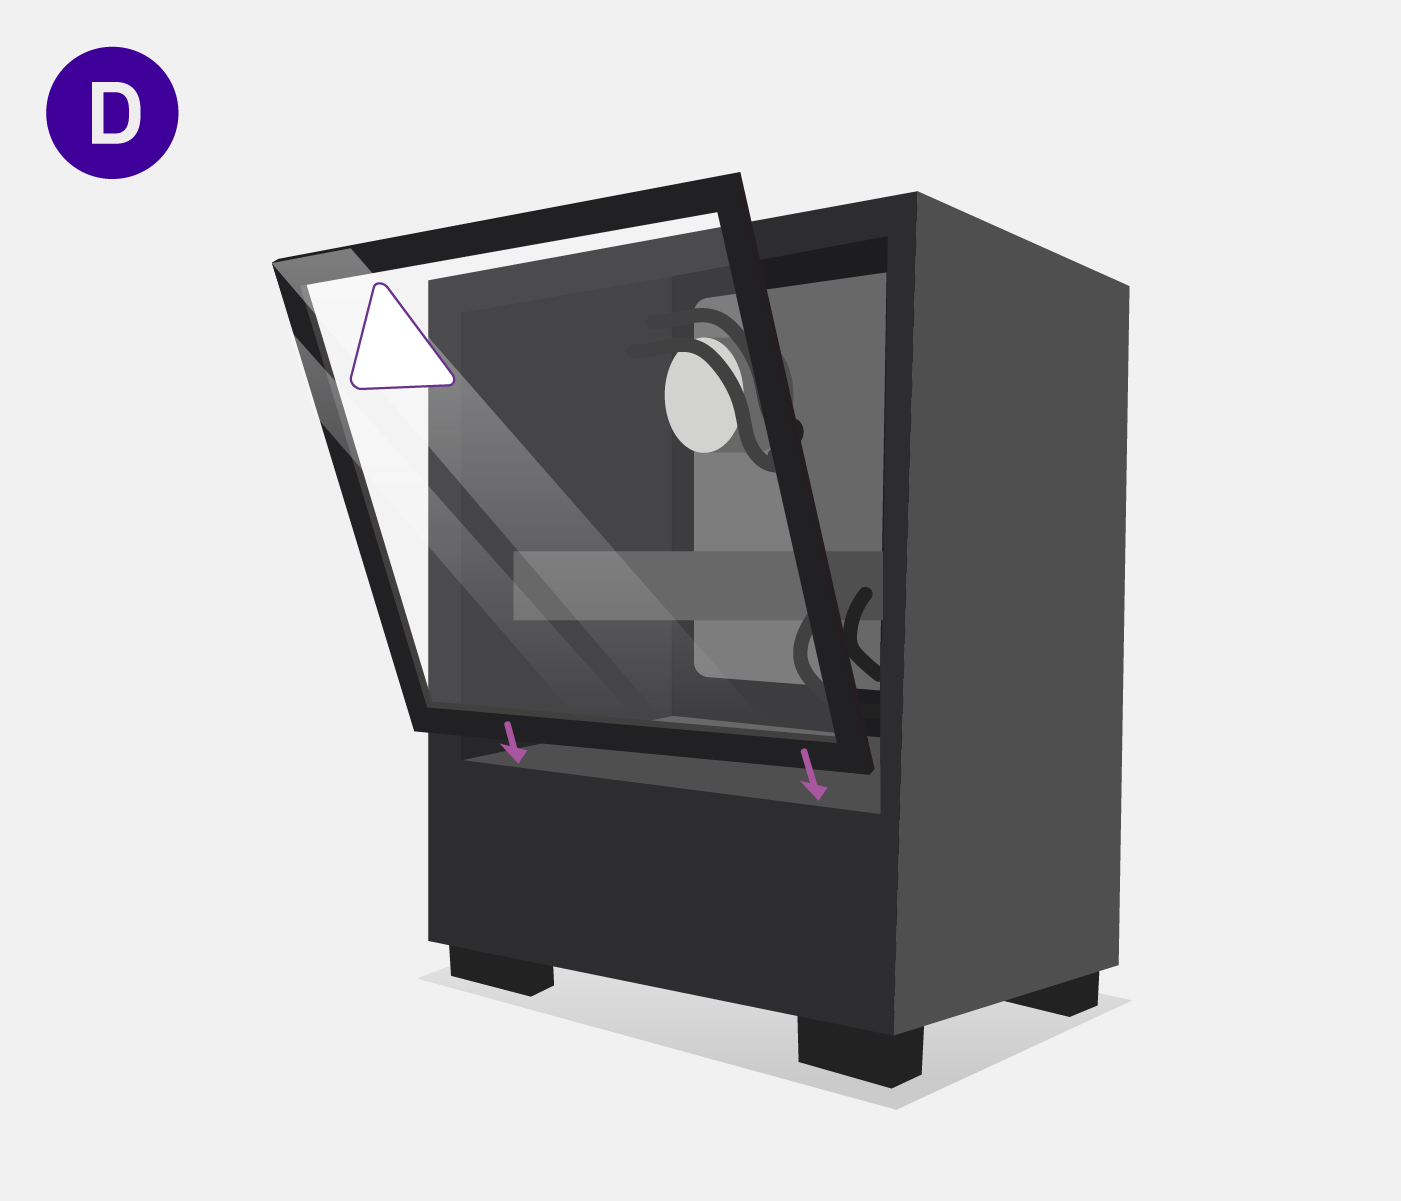
D. Close the Glass Panel
Slide the glass panel in at an angle, so that it is securely seated behind the metal bottom lip. Push the top of the glass gently into the rubber standoffs until you hear them "Pop" into place.
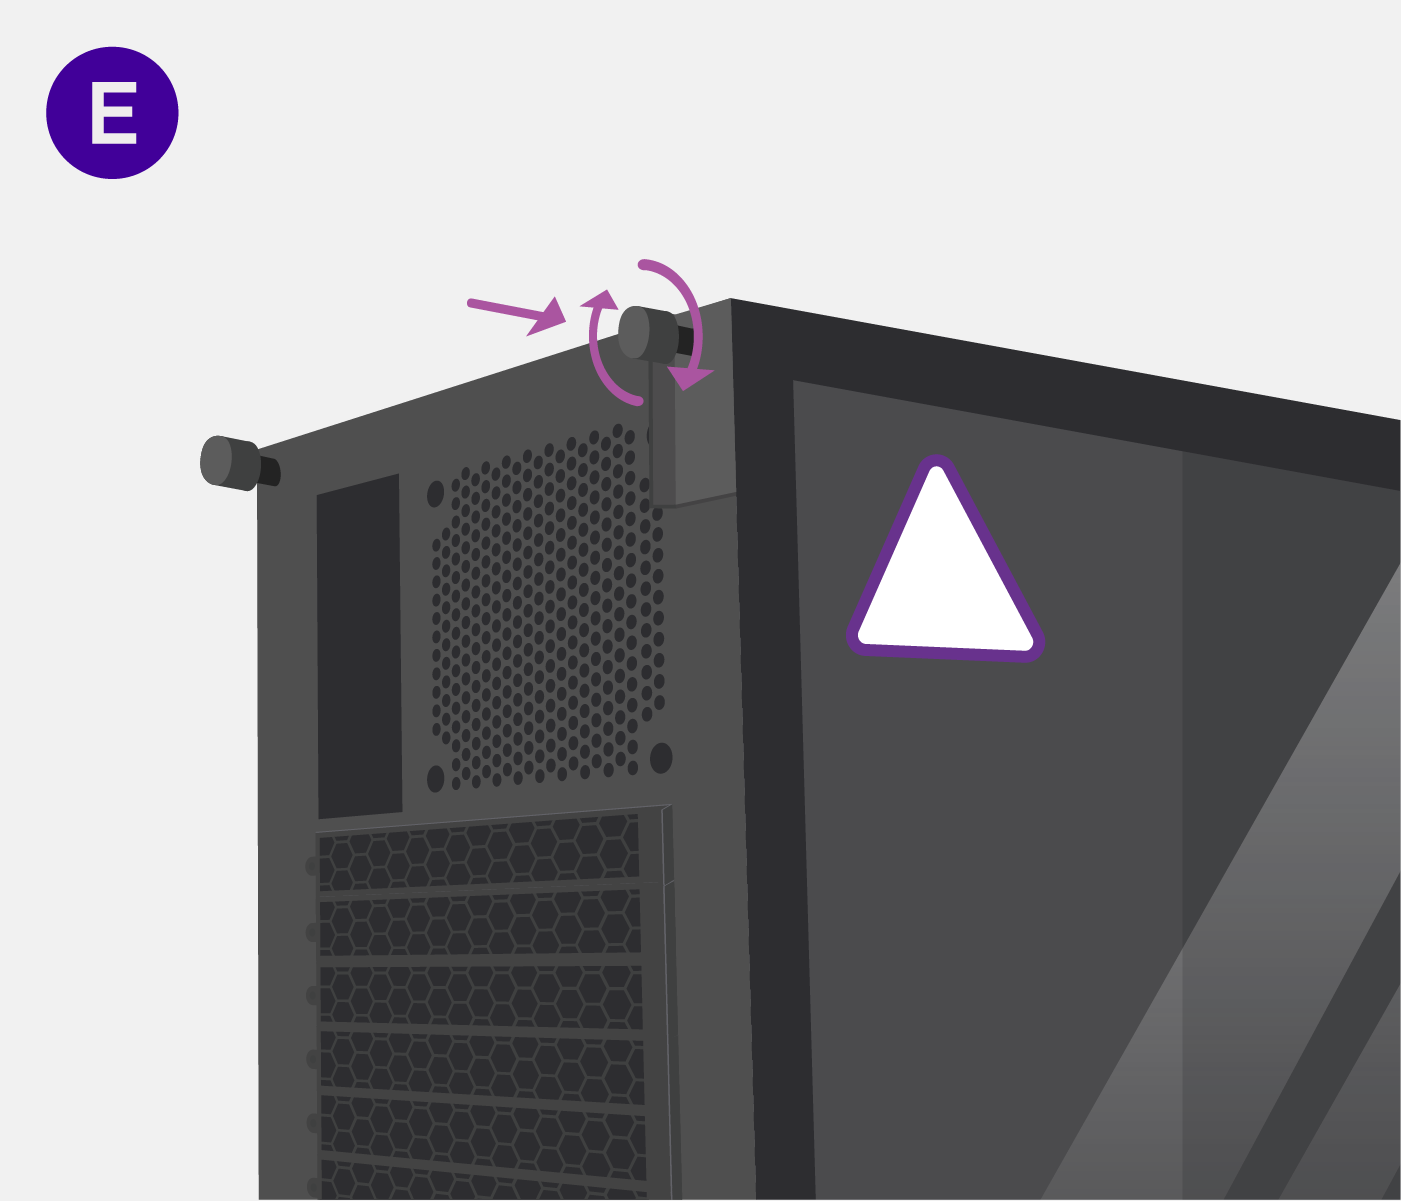
E. Secure the Glass Panel
Finally, secure the glass by turning the captive thumb-screw.
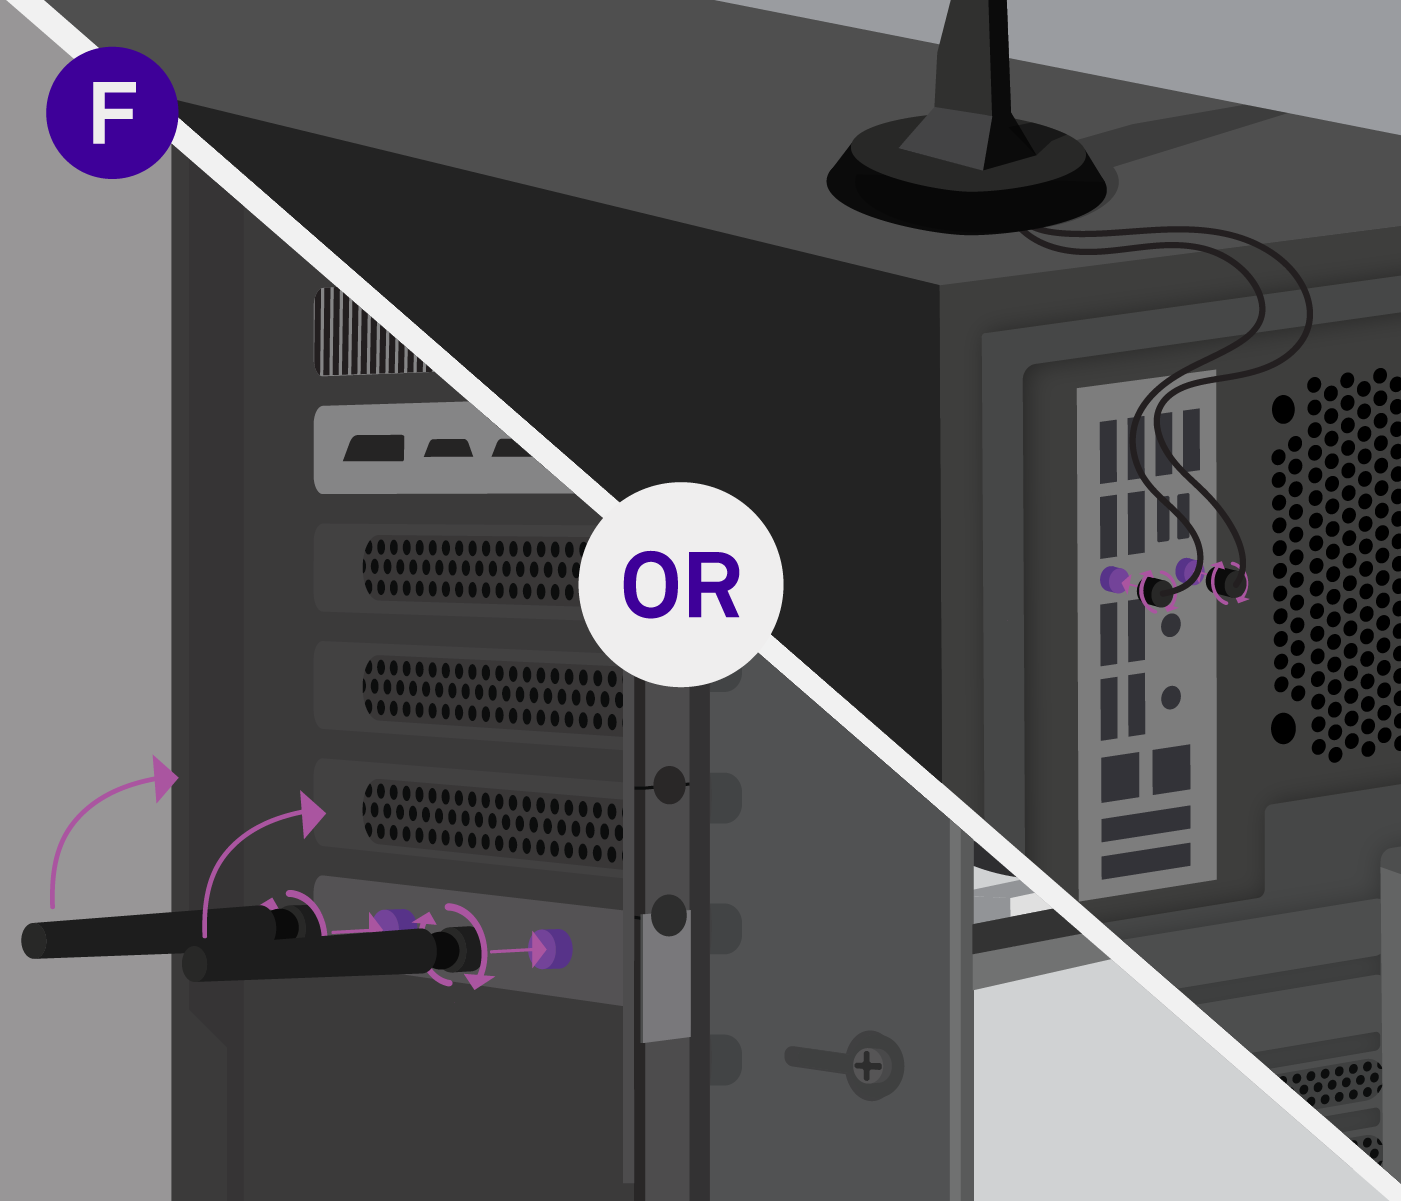
F. Attach the Wi-Fi Antenna(s)
Attach the antenna(s) that came with your Wi-Fi card or motherboard to the rear of your PC by screwing them onto the nubs (on the back of the card or IO shield). Screw them in at the base when turning them in or they may not attach properly.
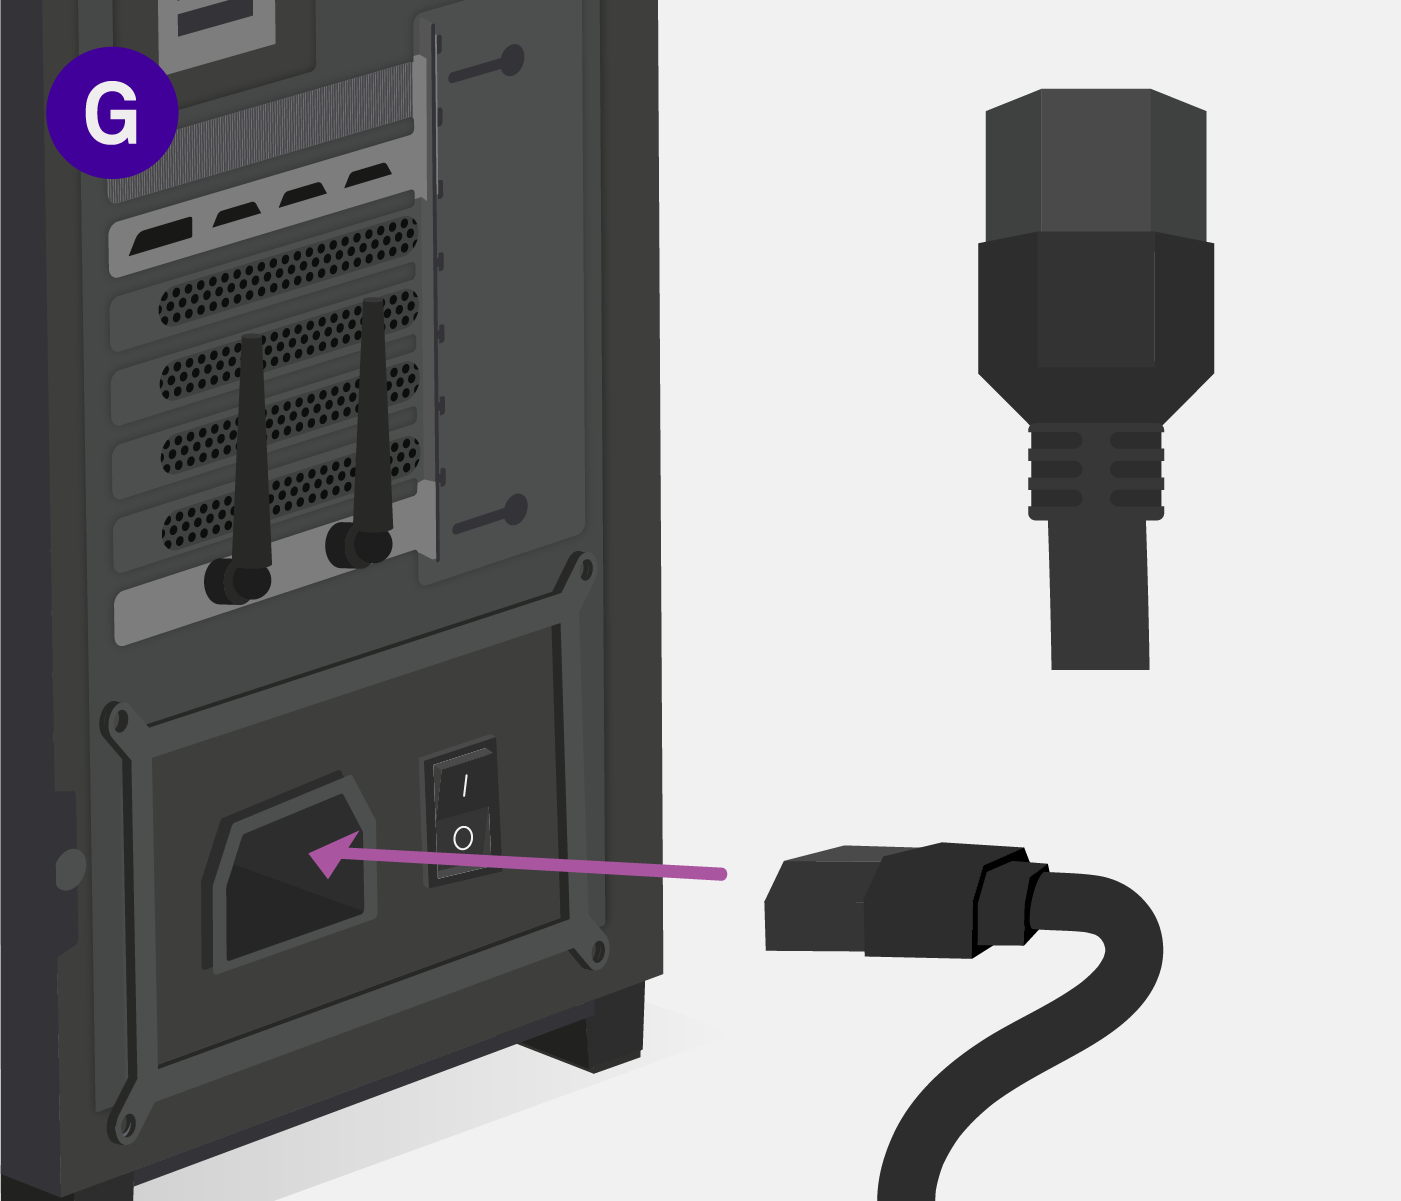
G. Plug in Power Cable
Plug the power supply into the wall using the power cable that was provided to you in the PSU box.
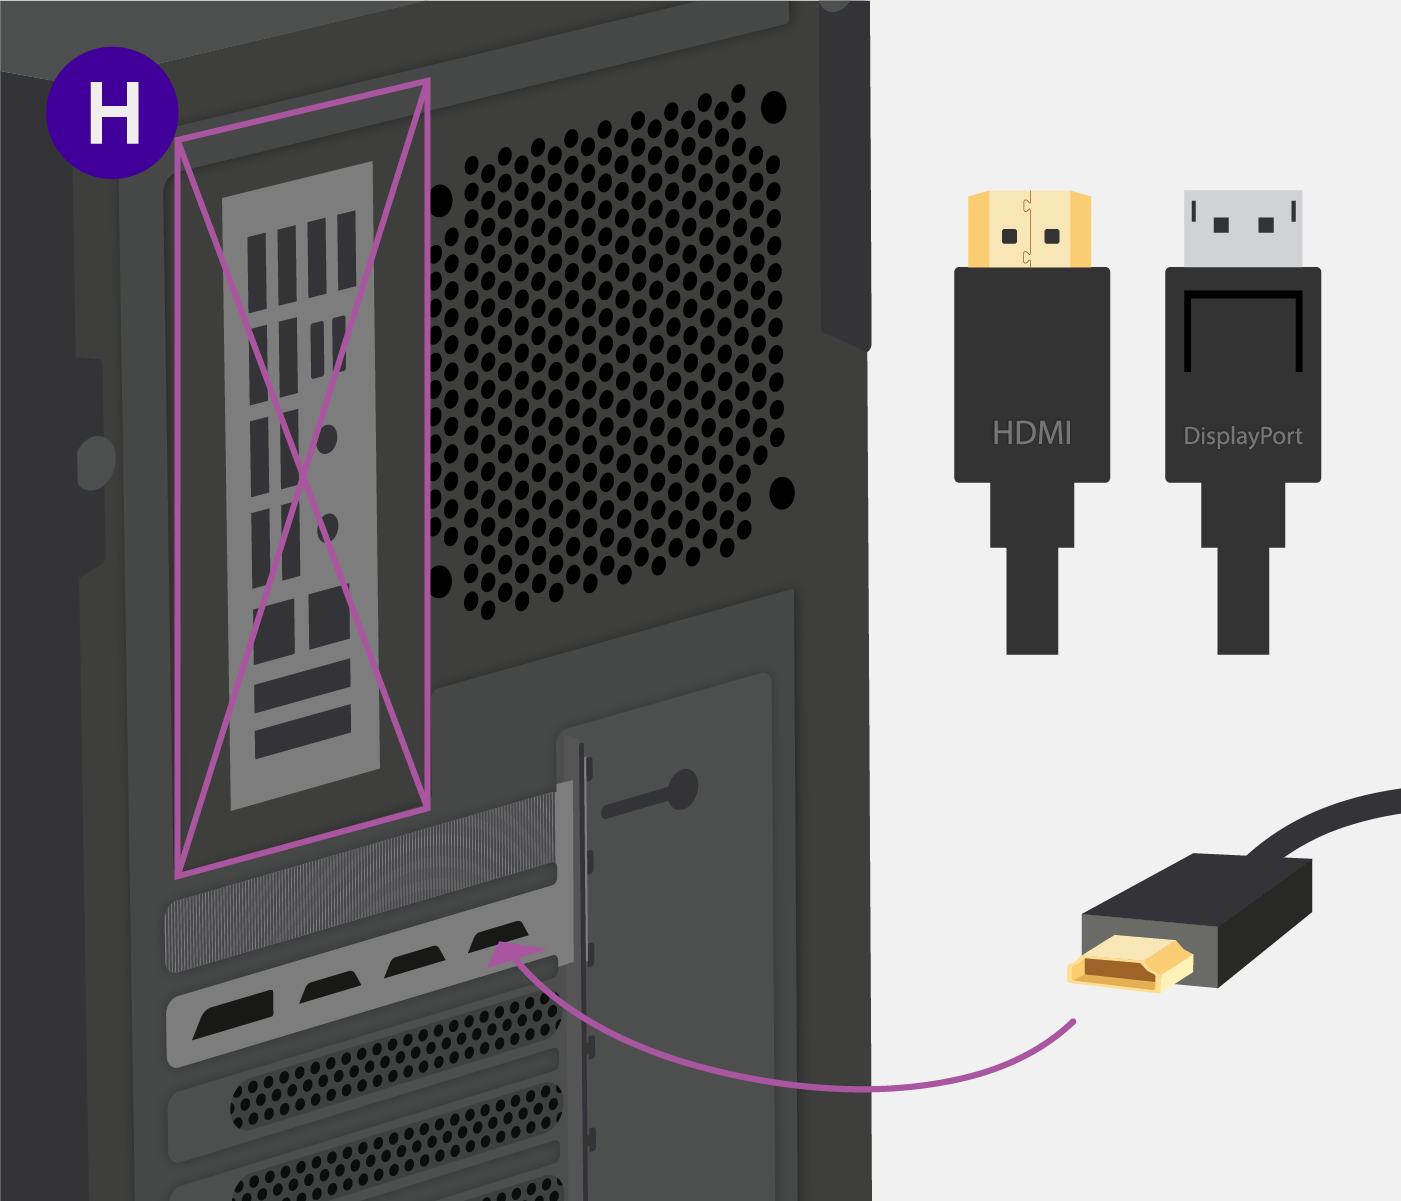
H. Plug in Display Cables
Plug in your monitor’s HDMI or DisplayPort Cable into the ports on your GPU. Do not plug into motherboard IO or you will get no display. The link above has info on displays and display cables.
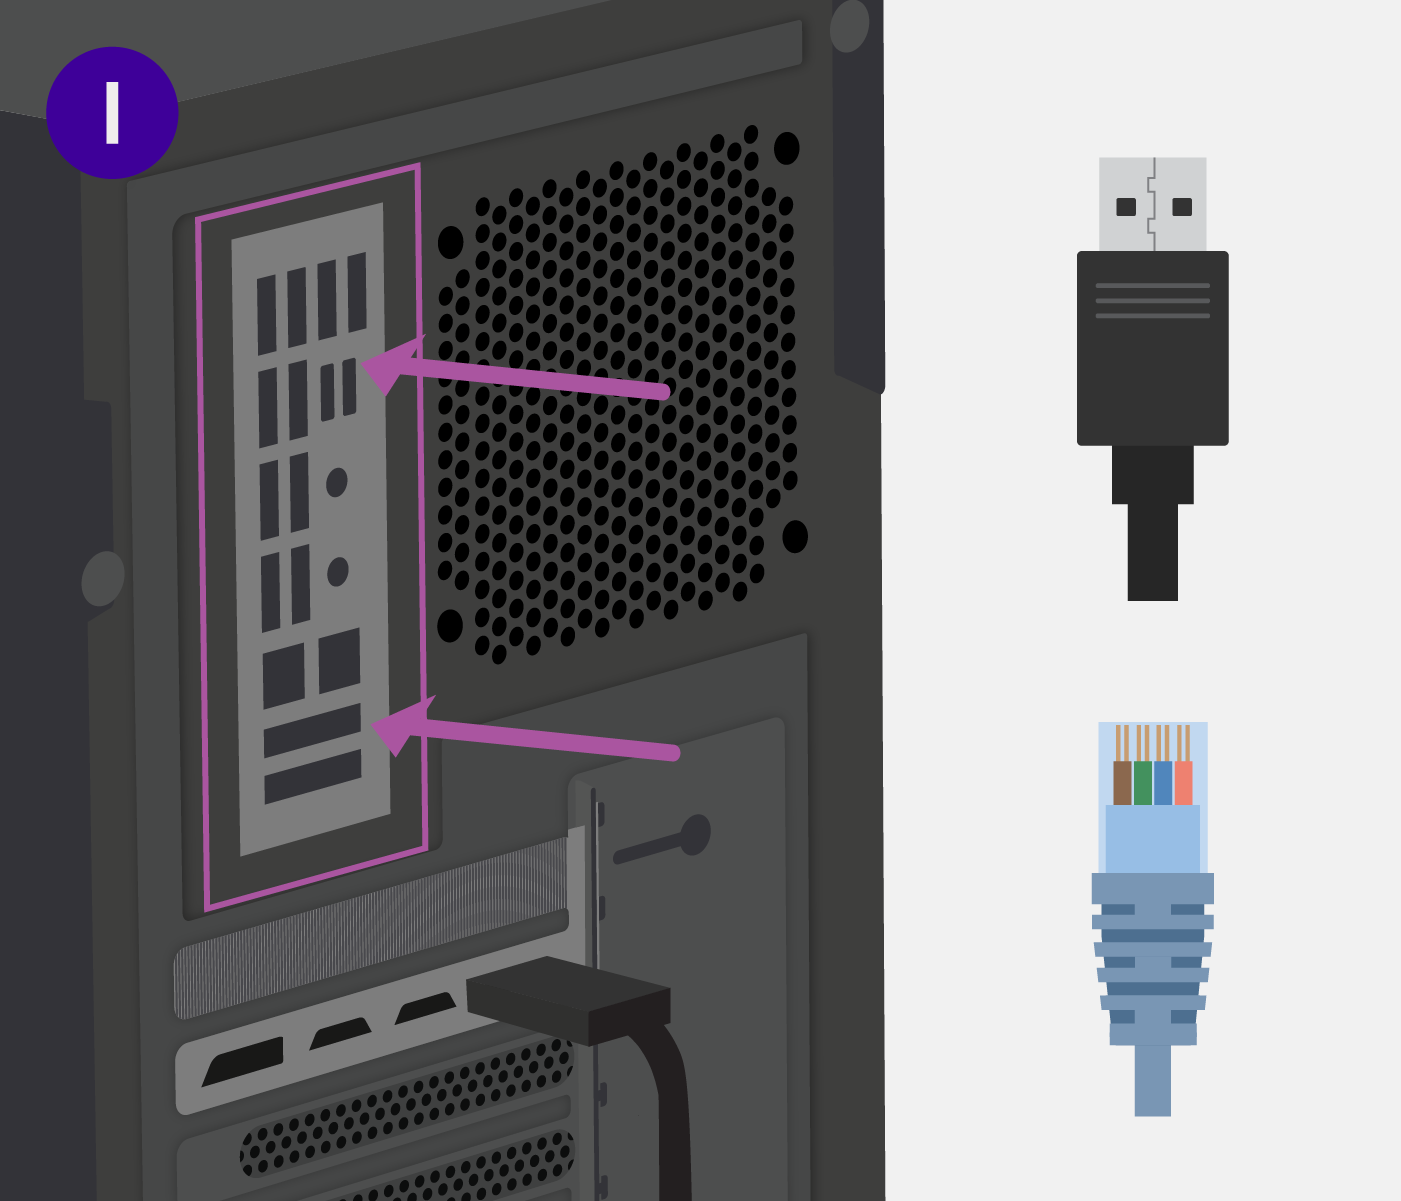
I. Plug in Ethernet / Peripherals
Plug in the mouse and keyboard to the motherboard, and if you have wired internet, this would be a good time to plug in the ethernet cable.

J. Turn on PSU
Turn on the PSU, this will NOT start your PC. It will simply provide power to your parts.
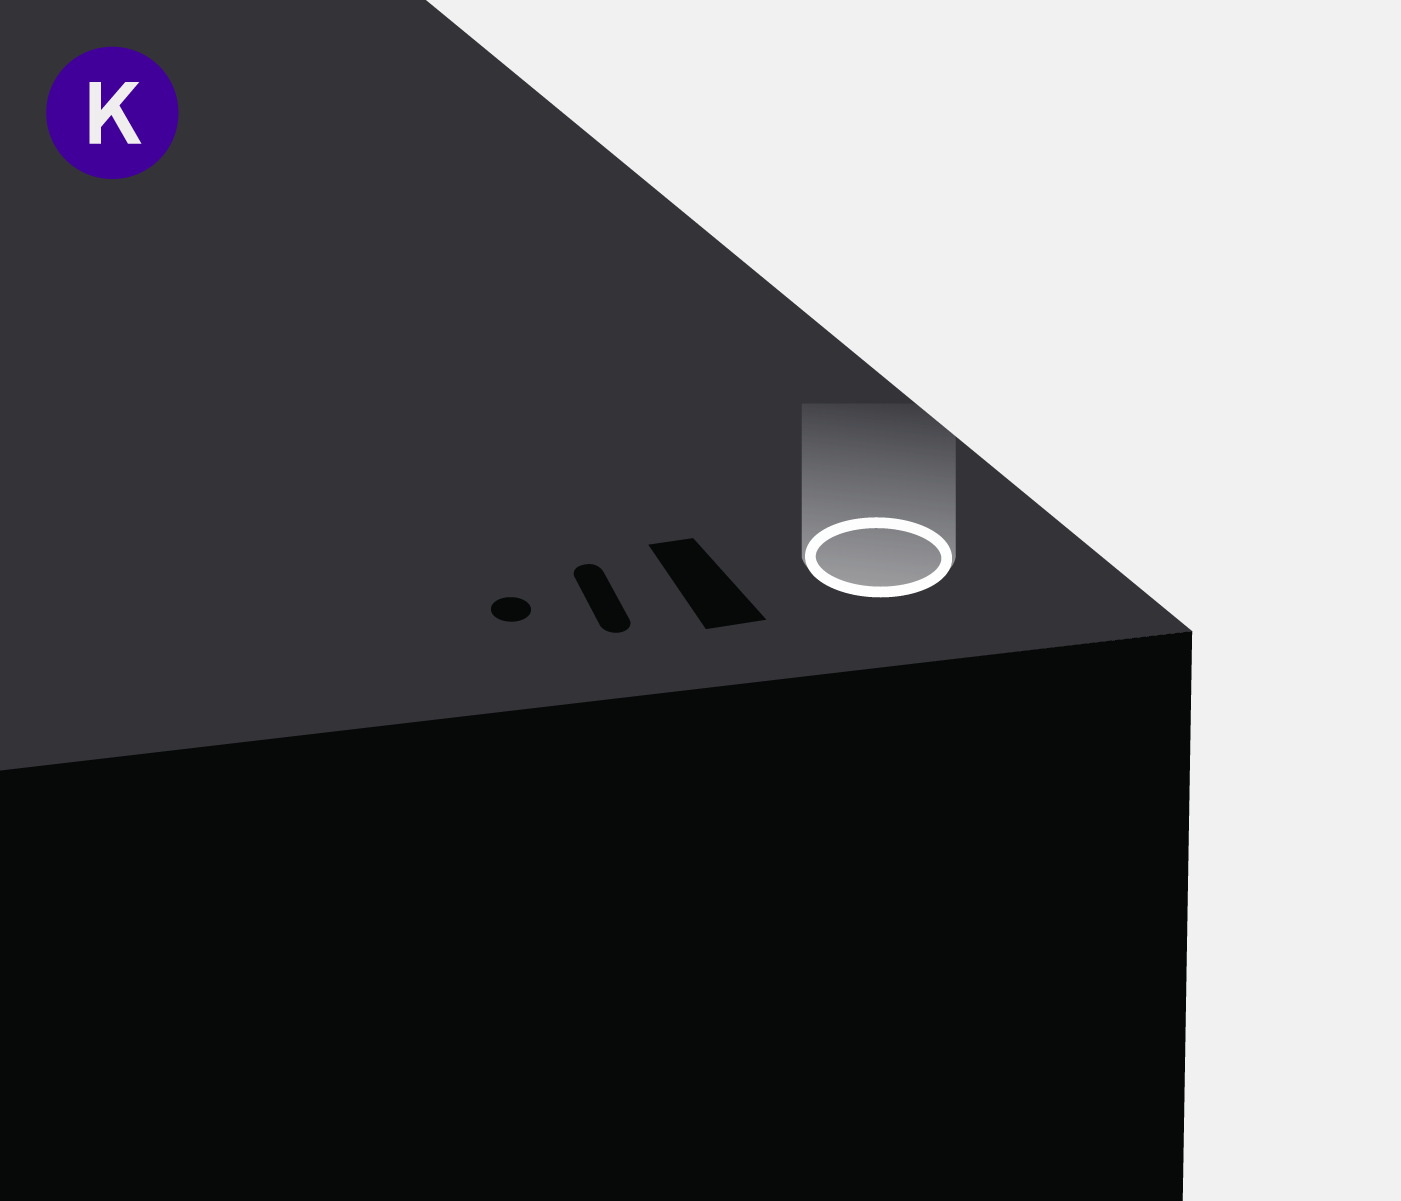
K. Turn on the PC
To turn on the PC, press the power button that is at the front-top area of the computer case.
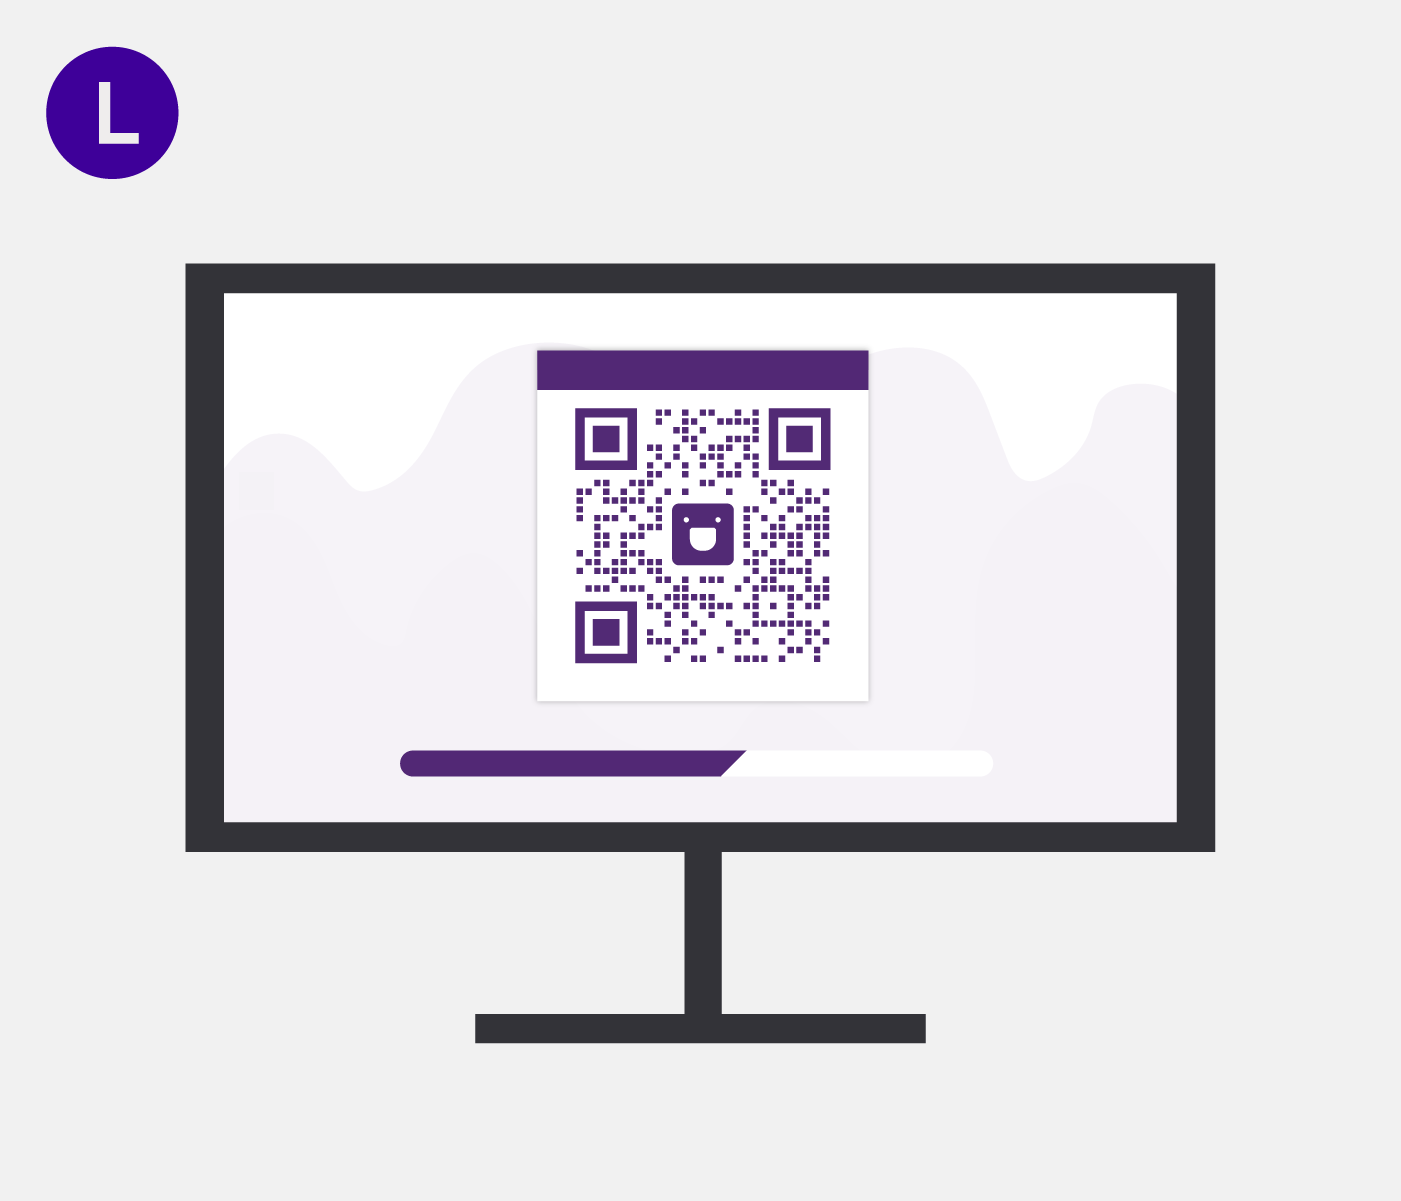
L. Update Drivers
We advise checking for and downloading driver updates on the official websites of your hardware for optimal performance. This QR code and link will take you to a list of websites that have drivers.
Quest Complete!
You've made it to the treasure room!
Online Tech Chatnzxt.com/support |
Call Center1 (844) 791-1341 |
Comments
0 comments
Please sign in to leave a comment.