
Video Walkthrough
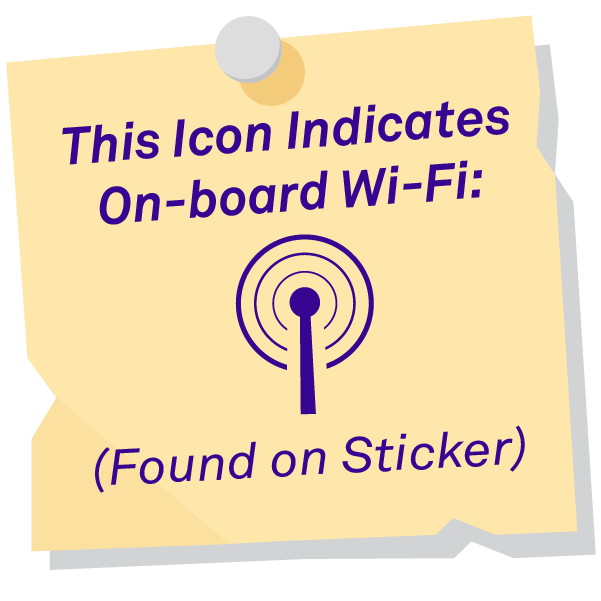 |
If your motherboard came with on-board Wi-Fi, skip this step and proceed to Level 11.(check sticker on packaging). |
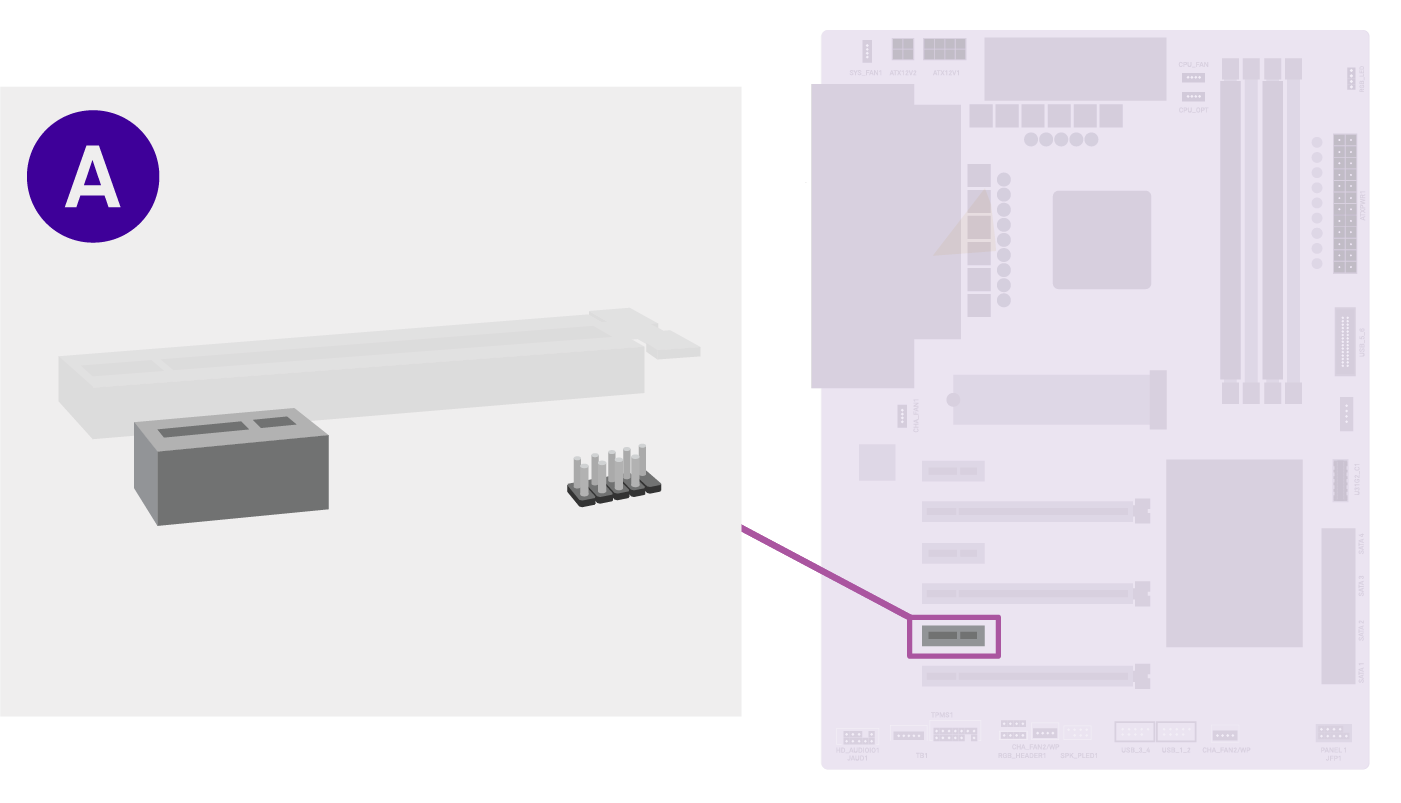
A. Locate the Bottom PCI Lane
Use the bottom most PCI lane.
On the bottom left side of the motherboard you will find all the PCI-E lanes. Locate the bottom most PCI lane for the Wi-Fi card installation.
No Wi-Fi Card? Skip to Level 11 if your board has on-board Wi-Fi. Look for a sticker on your motherboard packaging to determine if this applies to you.
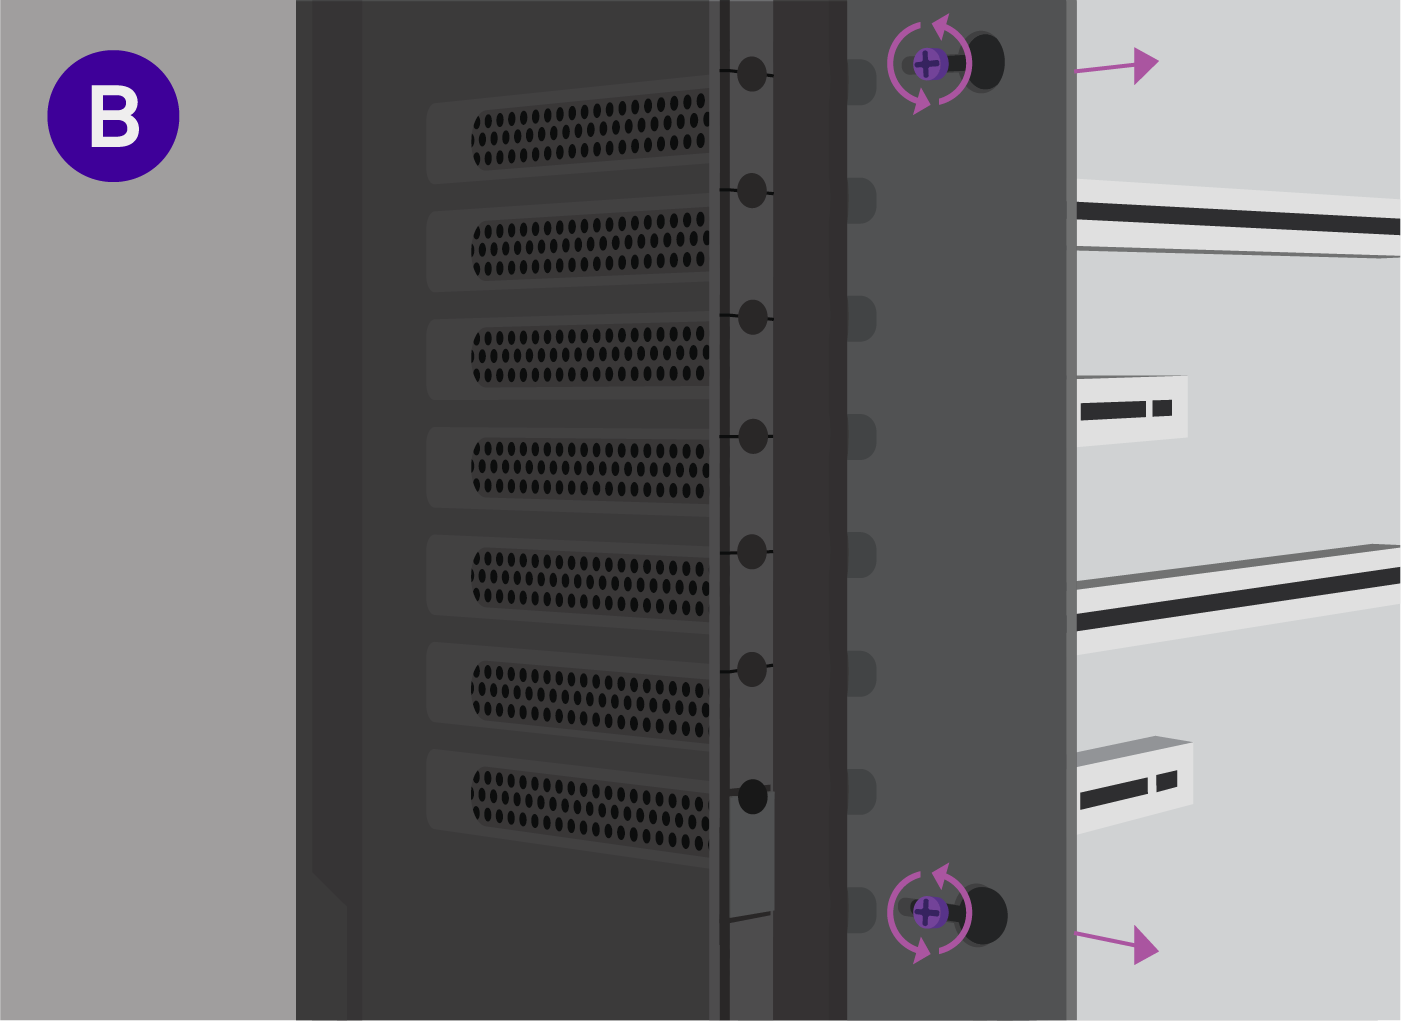
B. Slide out the Metal Panel
Note: Don't lose these screws.
On the rear of the PC, loosen the thumb-screws on the panel that is blocking the expansion slot covers. Slide the panel out of place. Keep this panel unscrewed for now.

C. Remove an Expansion Slot Cover
Remove the expansion slot cover that corresponds to the bottom PCI lane by unscrewing it from the case.
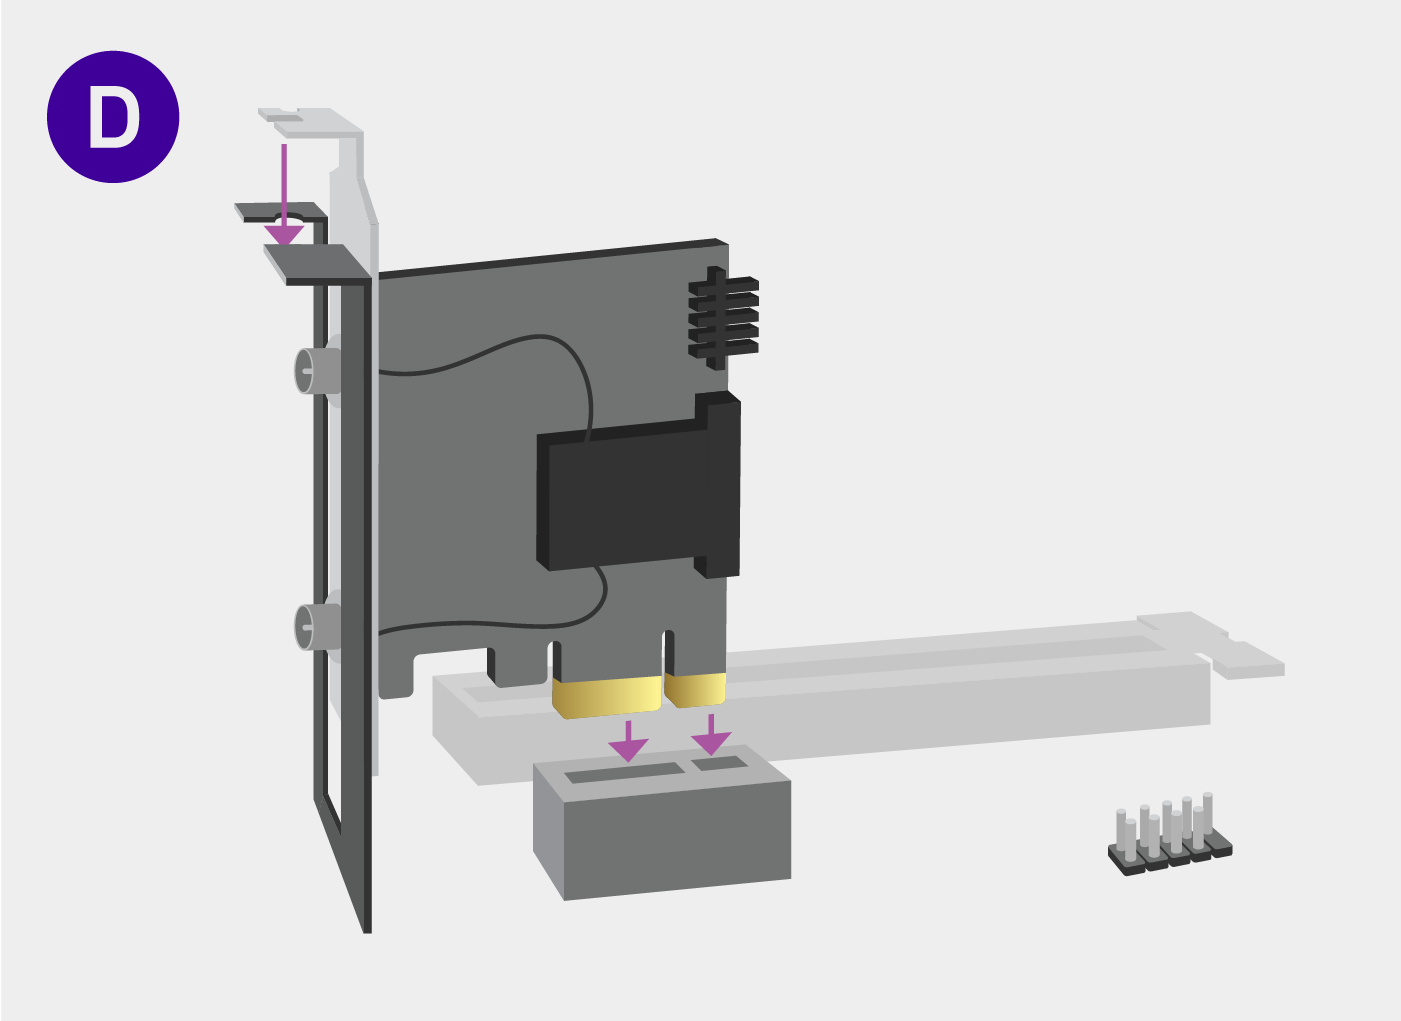
D. Install the Wi-Fi Card
Plug the Wi-Fi card into the PCI slot closest to the bottom of your motherboard.
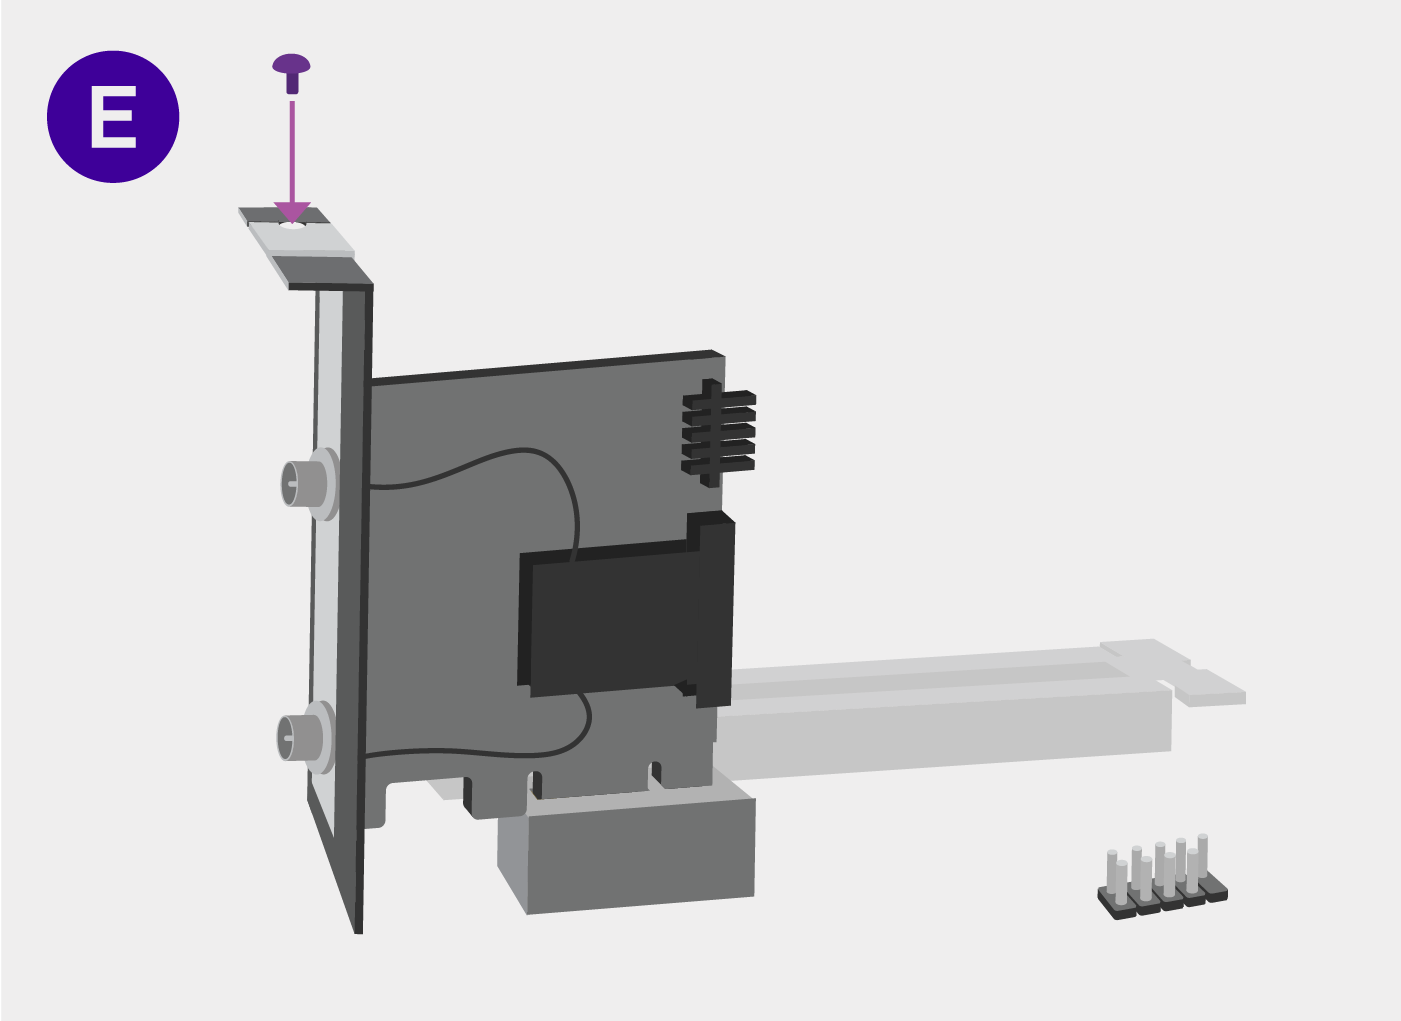
E. Secure the Wi-Fi Card
Secure the Wi-Fi card by screwing it into the case using the screw you removed on step C.
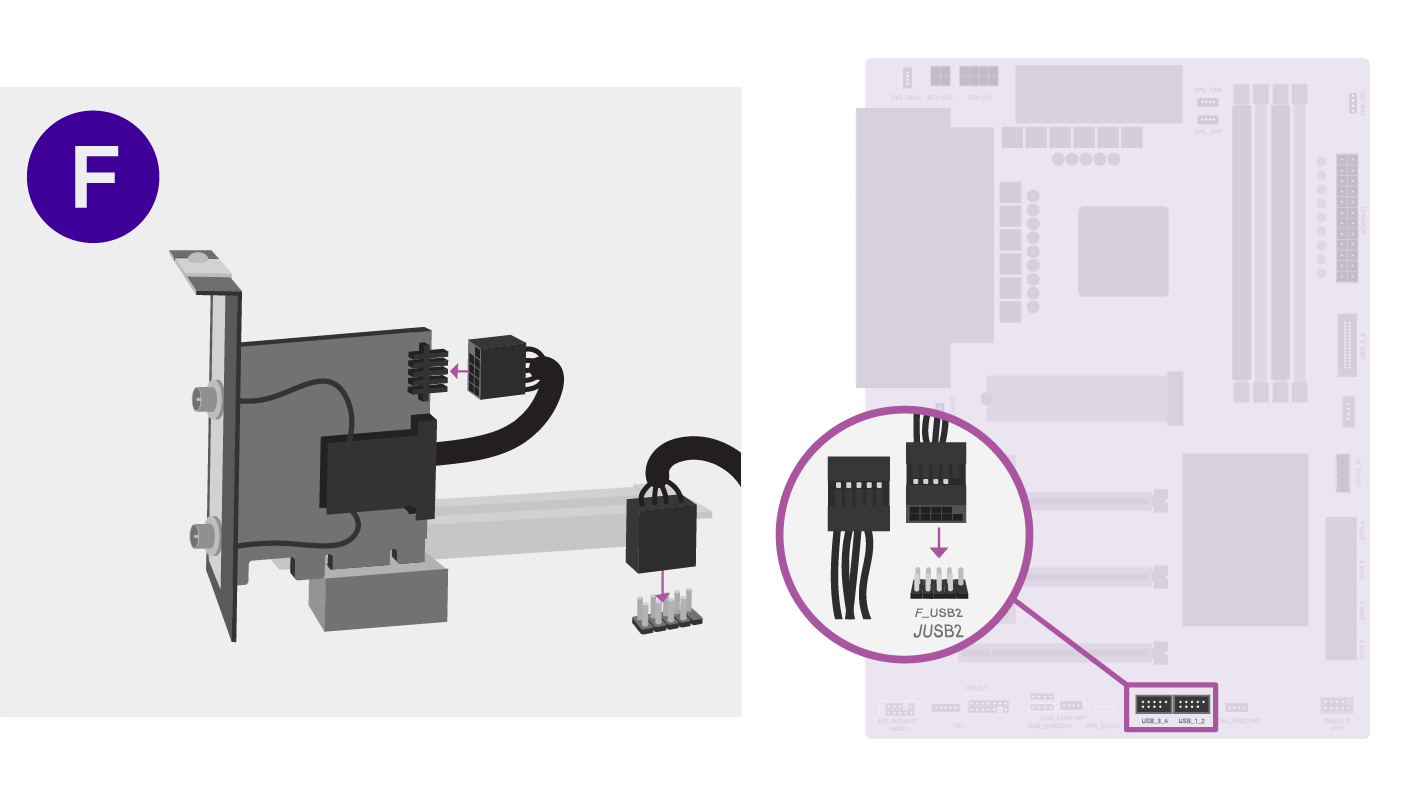
F. Plug in the Wi-Fi Card
Align the plugged hole on the wire with the one missing pin out of ten on the motherboard port.
Run the cable to an available USB2 port on the motherboard, hiding the cable if possible. Either end will fit into either port.

Online Tech Chatnzxt.com/support |
Call Center1 (844) 791-1341 |
Comments
0 comments
Please sign in to leave a comment.